
Are you interested in running DeepSeek, the powerful open-source language model, locally on your computer? It doesn’t matter whether you’re a developer, researcher, or AI enthusiast; learning how to run DeepSeek locally will give you greater control, privacy, and customization options compared to cloud-based solutions.
In this comprehensive guide, we’ll walk you through the process of setting up DeepSeek on your machine, covering system requirements, installation steps, and optimization tips.
Why Run DeepSeek Locally?
Before diving into the setup, let’s explore why running DeepSeek locally is beneficial:
- Privacy & Security: Keep your data offline without relying on third-party servers.
- No Internet Dependency: Use DeepSeek even without an internet connection.
- Customization: Fine-tune the model for specific tasks.
- Cost Efficiency: Avoid API costs associated with cloud-based AI models.
Now, let’s get into the step-by-step process.
Step 1: Check System Requirements
DeepSeek is a large language model (LLM), so running it locally requires sufficient hardware. Here’s what you’ll need:
Minimum Requirements
- OS: Windows (WSL recommended), Linux, or macOS
- RAM: 16GB (for smaller models)
- Storage: At least 20GB free space
- CPU: Modern multicore processor (Intel i7/Ryzen 7 or better)
Recommended for Best Performance
RAM: 32GB+ (for larger models)
GPU: NVIDIA (CUDA support) or AMD (ROCm) with at least 8GB VRAM
Storage: SSD for faster model loading
Step 2: Install Required Dependencies
To run DeepSeek locally, you’ll need:
- Python 3.8 or later
- PyTorch (with CUDA if using GPU)
- Hugging Face Transformers & “accelerate”
- Git (for downloading the model)

Step 3: Download the DeepSeek Model
DeepSeek models are available on Hugging Face’s Model Hub. You can download them directly using “transformers”.
Option 1: Using “transformers” (Automatic Download)

This will download the model the first time you run it.
Option 2: Manual Download (Offline Use)
If you want to store the model locally permanently:
1. Visit Hugging Face DeepSeek Model Page
2. Download the model files (“config.json”, “pytorch_model.bin”, etc.).
3. Load the model from the local directory:

Step 4: Run DeepSeek Locally
Now that everything is set up, let’s run a simple inference test.
Basic Text Generation Example

Optimizing Performance
Use GPU Acceleration: Move the model to CUDA if available.

Reduce Memory Usage: Enable 4-bit or 8-bit quantization.

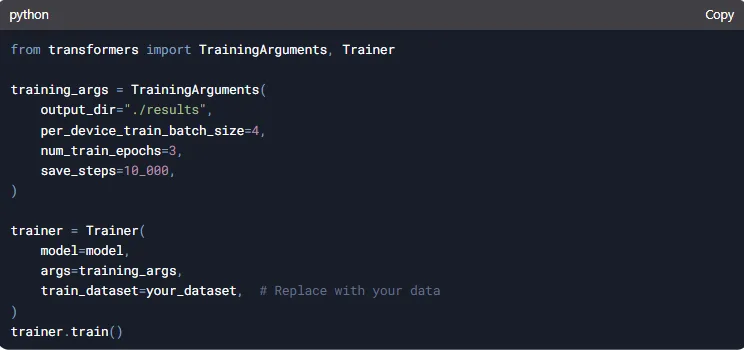
Step 5: Advanced Usage & Fine-Tuning
If you want to customize DeepSeek for specific tasks:
Fine-Tuning on Custom Data.
Using with LangChain for AI Apps.

Troubleshooting Common Issues
Out of Memory (OOM) Errors?
→ Reduce batch size or use model quantization.
Slow Performance?
→ Ensure GPU is being used (“nvidia-smi” to check).
Model Not Loading?
→ Verify Hugging Face token or download paths.
Conclusion
Running DeepSeek locally gives you full control over AI-powered text generation without relying on external APIs. By following this guide, you can set it up on your PC, optimize performance, and even fine-tune it for specialized tasks.
Now that you know how to run DeepSeek locally, why not experiment with building your own AI applications?
Leave a Reply